Wednesday, April 30, 2008

Turkey Meatball Soup with Cheese Toasts


I came up with this the other night when I wanted chicken noodle soup but with meatballs and more veggies. This is delicious and easy and kids love it. It makes alot and has a ton of liquid, but you need room in there for the meatballs and pasta to cook through. Plus soup is always good warmed up as leftovers, Right? I serve it with cheese toast- bread sprinkled with shredded mozzarella and shredded parmesan, toasted under the broiler until the cheese melts. Tasty~!


Turkey Meatball Soup with Cheese Toasts
for the soup:
1 Tbls olive oil
1 large onion, chopped
3-4 stalks of celery, from the heart, chopped leaves and all
5-6 cups chicken broth
2 cups beef broth
4-5 cups water
1 bay leaf
1 sprig fresh rosemary
2 sprigs fresh oregano
2 1/2 cups matchstick carrots
4-6 oz pasta, i used mini wheels, but anything will work
5 oz baby spinach
splash of red wine vinegar
for the meatballs:
1 pd. ground turkey breast
1 1/2 Tbls McCormick Roasted Garlic Grill Seasoning for Chicken
1 egg white
1-2 garlic cloves, minced
1/2 cup bread crumbs
1/4 cup grated Parmesan cheese
3 Tbls skim milk


1. Place a large soup pot or dutch oven over medium-high heat and add the olive oil. Add the onion and celery and saute until golden and tender. Add broths and water. Add bay leaf, rosemary, and oregano and bring to a boil.

2. Meanwhile, mix all meatball ingredients in a large bowl with your hands. Set aside.

3. Add carrots and pasta to soup and stir.

4. Take a small amount of the meatball mixture in your hands and shape into a small ball. Drop in the soup. Continue, until the meat mixture is gone. Stir the soup to make sure the meatballs all get cooked through. This should only take 5 minutes or so. I get one out and cut it in half to make sure that it is all the way cooked.

5. When the meatballs are cooked through and the pasta is tender, turn the heat off. Add the spinach and stir it in to wilt it. Remove oregano, rosemary and bay leaf. Stir in the red wine vinegar and serve with a sprinkle of shredded parmesan and cheese toast on the side.

Molasses-Oat Banana Bread

Our second choice for the molting bananas. This banana bread was moist and delicious, with a slight spiciness reminiscent of gingerbread.

Molasses-Oat Banana Bread (adapted from Cooking Light)
1 cup all-purpose flour
1/2 cup whole wheat flour
2/3 cup regular oats
1 teaspoon baking soda
1 teaspoon ground cinnamon
1/2 teaspoon salt
2/3 cup sugar
1/4 cup butter, softened
1/3 cup dark molasses
1/2 cup egg substitute
1 cup mashed ripe banana (about 2 bananas)
1/3 cup plain low-fat yogurt
1 teaspoon vanilla extract
Cooking spray


Preheat oven to 350°.
Lightly spoon flours into dry measuring cups; level with a knife. Combine flours, oats, baking soda, cinnamon, and salt, stirring with a whisk.

Place sugar, butter, and molasses in a large bowl; beat with a mixer at medium speed until well blended (about 1 minute). Add eggs, 1 at a time, beating well after each addition. Add banana, yogurt, and vanilla; beat until blended. Add flour mixture; beat at low speed just until moist. Spoon batter into an 8 1/2 x 4 1/2-inch loaf pan coated with cooking spray. Bake at 350° for 1 hour and 5 minutes or until a wooden pick inserted in center comes out clean. Cool 10 minutes in pan on a wire rack; remove from pan. Cool completely on wire rack.

Cardamom Banana Bread with Pistachios


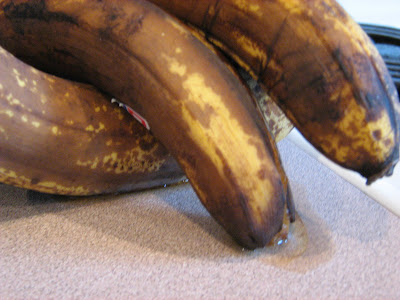
My brother was begging me to make banana bread with the quickly deteriorating bananas at his house. We went to Cooking Light and found 2 types we wanted to make. This banana bread was delicious and the flavors were excellent together. I know the banana pictures are kinda gross, but they were leaking banana juice all over the countertop!


Cardamom Banana Bread with Pistachios (adapted from Cooking Light)
1 cup all-purpose flour
1 cup whole wheat flour
3/4 teaspoon baking soda
1/2 teaspoon salt
1/2 cup granulated sugar
1/2 cup packed brown sugar
1/4 cup butter, softened
1/2 cup egg substitute
1 1/2 cups mashed ripe banana (about 3 bananas)
1/3 cup reduced-fat sour cream
1 teaspoon ground cardamom
1/3 cup finely chopped pistachios
Cooking spray

Preheat oven to 350°.
Lightly spoon flour into dry measuring cups, and level with a knife. Combine the flour, baking soda, and salt, stirring with a whisk.
Place sugars and butter in a large bowl, and beat with a mixer at medium speed until well blended (about 1 minute). Add the eggs, 1 at a time, beating well after each addition. Add banana, sour cream, and cardamom; beat until blended. Add flour mixture; beat at low speed just until moist. Stir in pistachios. Spoon batter into a 9 x 5-inch loaf pan coated with cooking spray. Bake at 350° for 1 hour or until a wooden pick inserted in center comes out clean. Cool 10 minutes in pan on a wire rack; remove from pan. Cool bread completely on wire rack.

Tuesday, April 29, 2008

TWD- Fluted Polenta and Ricotta Cake

It's Tuesday and that means Fluted Polenta and Ricotta Cake, or in my case, Fluted Cornmeal and Cottage Cheese/Cream Cheese Cake with Dried Blueberries. This week's Tuesdays with Dorie recipe was chosen by Caitlin over at Engineer Baker. I didn't have ricotta cheese or figs on hand, so I decided to see if I could use whatever I had at my house. IT WORKED!

I used 1/2 cup 1% cottage cheese, which I blended in the blender to make smooth and then, 1/2 cup 1/3 less fat cream cheese, in substitution for the 1 cup ricotta cheese and dried blueberries in place of the figs. I also reduced the sugar to 1/4 cup after reading comments on the Tuesdays with Dorie page about it being a little too sweet. The overall cake was not a favorite of my husbands or older kids, but my baby loved it! I am always up for trying something new and this definitely fit that bill. I also used an 11-inch tart pan because other people were commenting about having trouble with the batter overflowing. And as Dorie says, this one really is better the next day. "It tastes like lemon yogurt cake, no cornbread, wait a blueberry muffin!"


Fluted Polenta and Ricotta Cake

About 16 moist, plump dried Mission or Kadota figs, stemmed
1 c. medium-grain polenta or yellow cornmeal
½ c. all-purpose flour
1 tsp baking powder
1 c. ricotta
1/3 c. tepid water
¾ c. sugar
¾ c. honey (if you’re a real honey lover, use a full-flavored honey such as chestnut, pine, or buckwheat)
Grated zest of 1 lemon
2 large eggs

Getting Ready: Center a rack in the oven and preheat the oven to 325 degrees F. Butter a 10 ½-inch fluted tart pan with a removable bottom and put it on a baking sheet lined with parchment or a silicone mat.
Check that the figs are, indeed, moist and plump. If they are the least bit hard, toss them into a small pan of boiling water and steep for a minute, then drain and pat dry. If the figs are large (bigger than a bite), snip them in half.
Whisk the polenta, flour, baking powder, and salt together.
Working with a stand mixer fitted with the whisk attachment or with a hand mixer in a large bowl, beat the ricotta and water together on low speed until very smooth. With the mixer at medium speed, add the sugar, honey, and lemon zest and beat until light. Beat in the melted butter, then add the eggs one at a time, beating until the mixture is smooth. Reduce the mixer speed to low and add the dry ingredients, mixing only until they are fully incorporated. You’ll have a sleek, smooth, pourable batter.
Pour about one third of the batter into the pan and scatter over the figs. Pour in the rest of the batter, smooth the top with a rubber spatula, if necessary, and dot the batter evenly with the chilled bits of butter.

Bake for 35 to 40 minutes, or until a thin knife inserted into the center of the cake comes out clean. The cake should be honey brown and pulling away just a little from the sides of the pan, and the butter will have left light-colored circles in the top. Transfer the cake to a rack and remove the sides of the pan after about 5 minutes. Cool to warm, or cool completely


Monday, April 28, 2008

Whole Wheat Rotini with Kale, Yellow Squash, Eggplant, and Ground Turkey

This is the result of a look in the fridge and making something out of nothing, It turned out very tasty, as the kids gobbled it down. Success!


Whole Wheat Rotini with Kale, Yellow Squash, Eggplant, and Ground Turkey

14.5 oz boz whole wheat rotini

2 Tbls olive oil, divided

1 medium onion, chopped

4 garlic cloves, minced

1 can chicken broth

1 large eggplant, peeled and chopped

3 medium yellow squash, sliced lengthwise twice, then chopped

2 bunches kale, washed, stems removed and chopped

16 oz lean ground turkey

2-3 Tbls Italian seasoning

1 Tbls dried onion flakes

chopped fresh parsley

feta or parmesan cheese


1. Cook pasta according to box directions.

2. Meanwhile, heat 1 Tbls olive oil in a dutch oven. Add onion and saute for a few minutes, until almost tender. Add garlic and saute for 30 seconds. Add 1/4 cup chicken broth to pan and stir. Add eggplant and yellow squash. Add 1/2 cup chicken broth and 1 Tbls Italian seasoning; stir. Cover and cook over medium heat.

3. If the pasta is close to being done, add kale to pasta pot and stir. Cover and cook for at least 5 minutes or until kale is tender. Turn off heat.

4. Heat remaining Tbls olive oil to a skillet and add ground turkey. Sprinkle with onion flakes and italian seasoning. Break up with a wooden spoon, and continue to cook, occasionally adding chicken broth to keep the meat moist. When meat is cooked, add squash-eggplant mixture to meat mixture.

5. Drain pasta-kale mixture and transfer to large bowl. With a slotted spoon add meat-eggplant/squash mixture to pasta. Mix well and serve. Garnish with chopped parsley and feta or parmesan cheese.


Sunday, April 27, 2008

Daring Bakers-Cheesecake Pops


I am soo excited! This is my first post as a Daring Baker and it was so fun to do this challenge. Thanks to Elle over at Feeding My Enthusiasms and Deborah of Taste and Tell, for choosing Cheesecake Pops from Sticky, Chewy, Messy, Gooey by Jill O'Conner.


I have made cheesecake before, so I wasn't really intimidated by the water bath or the cheesecake.


It did take a 10-20 minutes longer than the recipe stated to get the cheesecake firm and slightly browned on top.


I used a variety of dippers- milk, dark, and white chocolate, candy coating and all kinds of sprinkles for dipping, as well as toffee bits, chopped pecans, chopped Andes mints, and graham cracker crumbs. I guess you could say I went for it all!


At first I was confused as to why this recipe was included in a cookbook with such a title, but when I started to dip the batter out, it all became clear. These were indeed Sticky, Messy, and Gooey.


I made 120 of these because after I scooped the batter for the pops out of the top of the pan of cheesecake, there was so much batter left that I decided to put it in a bowl, stir it up, and pipe it into little balls, so that none of it would go to waste.


Luckily, I had two events that I needed to make refreshments for, so we didn't end up eating all of them!


Cheesecake Pops


Makes 30 – 40 Pops


5 8-oz. packages cream cheese at room temperature

2 cups sugar

¼ cup all-purpose flour

¼ teaspoon salt

5 large eggs

2 egg yolks

2 teaspoons pure vanilla extract

¼ cup heavy cream

Boiling water as needed

Thirty to forty 8-inch lollipop sticks

1 pound chocolate, finely chopped – you can use all one kind or half and half of dark, milk, or white (Alternately, you can use 1 pound of flavored coatings, also known as summer coating, confectionary coating or wafer chocolate – candy supply stores carry colors, as well as the three kinds of chocolate.)

2 tablespoons vegetable shortening(Note: White chocolate is harder to use this way, but not impossible)

Assorted decorations such as chopped nuts, colored jimmies, crushed peppermints, mini chocolate chips, sanding sugars, dragees) - Optional


Position oven rack in the middle of the oven and preheat to 325 degrees F. Set some water to boil. In a large bowl, beat together the cream cheese, sugar, flour, and salt until smooth. If using a mixer, mix on low speed. Add the whole eggs and the egg yolks, one at a time, beating well (but still at low speed) after each addition. Beat in the vanilla and cream. Grease a 10-inch cake pan (not a springform pan), and pour the batter into the cake pan. Place the pan in a larger roasting pan. Fill the roasting pan with the boiling water until it reaches halfway up the sides of the cake pan. Bake until the cheesecake is firm and slightly golden on top, 35 to 45 minutes. Remove the cheesecake from the water bath and cool to room temperature. Cover the cheesecake with plastic wrap and refrigerate until very cold, at least 3 hours or up to overnight.


When the cheesecake is cold and very firm, scoop the cheesecake into 2-ounce balls and place on a parchment paper-lined baking sheet. Carefully insert a lollipop stick into each cheesecake ball. Freeze the cheesecake pops, uncovered, until very hard, at least 1 – 2 hours.


When the cheesecake pops are frozen and ready for dipping, prepare the chocolate.


In the top of a double boiler, set over simmering water, or in a heatproof bowl set over a pot of simmering water, heat half the chocolate and half the shortening, stirring often, until chocolate is melted and chocolate and shortening are combined. Stir until completely smooth. Do not heat the chocolate too much or your chocolate will lose it’s shine after it has dried. Save the rest of the chocolate and shortening for later dipping, or use another type of chocolate for variety. Alternately, you can microwave the same amount of chocolate coating pieces on high at 30 second intervals, stirring until smooth. Quickly dip a frozen cheesecake pop in the melted chocolate, swirling quickly to coat it completely. Shake off any excess into the melted chocolate. If you like, you can now roll the pops quickly in optional decorations. You can also drizzle them with a contrasting color of melted chocolate (dark chocolate drizzled over milk chocolate or white chocolate over dark chocolate, etc.) Place the pop on a clean parchment paper-lined baking sheet to set. Repeat with remaining pops, melting more chocolate and shortening (or confectionary chocolate pieces) as needed.


Lemon Meringue Cupcakes


I am the first to admit that I get too many magazines in the mail, but I only do it for the recipes. This is one from Rachael Ray Everyday that I have been wanting to make for awhile. I got the perfect opportunity when my dad asked for some treats. His favorite dessert is Lemon Meringue Pie and you have to make these because you will not believe how they taste exactly like it even though they are Cake! The cake tastes like pie crust in a miraculous way, flaky and delicious. The lemon curd is like the filling and the meringue is the meringue. It is wild to pop one of these minis in your mouth. Next time, I want to make the curd from scratch but I was in a pinch, so I used Dickinson's Lemon Curd.


From Every Day with Rachael RayApril 2007


MAKES FOUR DOZEN


Prep Time: 30 min


Bake Time: 30 min
1 1/2 cups flour
1/2 teaspoon baking powder
1/4 teaspoon salt
1/2 cup buttermilk
1 tablespoon lemon juice
2 sticks (8 ounces) unsalted butter, softened
1 2/3 cups sugar, plus more for decorating
2 tablespoons finely grated lemon peel, plus thin strips of peel for garnish
2 large eggs plus 4 egg whites, at room temperature
One 10- to 12-ounce jar lemon curd


1. Position a rack in the center of the oven and preheat to 350°. Line mini-muffin pans with paper liners. In a medium bowl, combine the flour, baking powder and salt. In a separate bowl, combine the buttermilk and lemon juice.


2. Using an electric mixer, beat the butter on high speed until creamy, about 1 minute. Add 1 cup sugar and the lemon peel and beat until fluffy, about 5 minutes. Add the 2 eggs, one at a time, and beat until combined, scraping down the sides between additions. On low speed, beat in a third of the dry ingredients, then a third of the buttermilk mixture. Repeat, alternating ingredients, until the batter is smooth.


3. Spoon the batter into each liner, about three-quarters full. Bake until a toothpick comes out clean, about 20 minutes. Let cool on a rack.


4. In a heatproof bowl, whisk together the remaining 2/3 cup sugar and the egg whites. Place over a saucepan of barely simmering water, making sure the water doesn't touch the bowl, and heat just until the sugar dissolves, whisking constantly. Remove from the heat and beat on high speed until stiff, glossy peaks form.


5. Spread a thin layer of lemon curd over each cupcake and dollop the meringue on top. Toss the lemon peel strips in sugar to coat, and place one on each cupcake.


Brownie Bites

This is one of the recipes I made for my dad. I even got to use some of my royal icing flowers from my cake decorating class.

I saw these in Rachael Ray's magazine awhile ago, and have been waiting for a good reason to make them. They are dark, dense, and perfect if you like a fudgy brownie. A little bit goes a long way on these and the coconut milk in the topping adds the perfect touch.


Yummy batter!

My baby couldn't help getting into the dirty dishes on this one!


Brownie Bites
From Every Day with Rachael Ray April 2007

MAKES FOUR DOZEN

Prep Time: 15 min(plus chilling)

Bake Time: 50 min
2 sticks (8 ounces) unsalted butter
8 ounces unsweetened chocolate, cut into small pieces
2 1/4 cups sugar
4 large eggs, at room temperature
1 teaspoon pure vanilla extract
1 cup flour
1/2 teaspoon salt
4 ounces chocolate chips
1/3 cup canned unsweetened coconut milk
1 tube store-bought decorating icing


1. Preheat the oven to 350°. Line an 8-inch square baking pan with enough foil to let flaps hang over two sides; grease the foil.


2. In a double boiler, melt together the butter and unsweetened chocolate, stirring occasionally. Let cool slightly, then beat in the sugar, eggs and vanilla with a wooden spoon until glossy. Stir in the flour and salt. Spread the batter evenly in the prepared pan and bake until the top cracks and a toothpick inserted into the center comes out moist, about 50 minutes. Let cool.


3. Meanwhile, place the chocolate chips in a medium bowl. In a small saucepan, bring the coconut milk to a simmer. Pour the coconut milk over the chocolate chips and let stand for 5 minutes, then whisk until smooth. Pour the warm glaze over the cooled brownies and tilt the pan to coat evenly. Refrigerate until the glaze is set, about 2 hours. Using the foil flaps, gently remove the chilled brownies from the pan and cut into 1-inch squares.


Decorate the Brownie Bites with the icing.


Trio of Treats

My dad asked me to make him some desserts for a meeting, so I went with three bite size treat and boy, were they Delish! Cheesecake Pops, Brownie Bites and Lemon Meringue Cupcakes- Give 'em a whirl!


Friday, April 25, 2008

Better Breakfasts-Homemade Egg Bacon McMuffins and Peanut Butter-Strawberry Whole Wheat Toast

I have been making an effort to have healthier, heartier, breakfasts that provide more energy, fiber and nutrients than a bowl of cereal. Here are two of our recent recipes (not served together, obviously)
I have been making these Homemade Egg Bacon McMuffins for awhile. Depending on how many people you are serving, the amount of ingredients will vary. Each McMuffin uses 2-3 slices turkey bacon, 1 english muffin, 1 slice cheese, and 1-1/2 eggs.
In a skillet, cook turkey bacon over medium heat until crisp and browned, 5-7 minutes, turning every few minutes. Remove to a plate covered with paper towels when done.
Meanwhile, in a bowl, mix 2 egg whites, 1/2 cup egg substitute, 2 eggs, dash of salt and pepper, and some dried chives. Cook this mixture in a small skillet over medium low heat. Don't scramble it too much, let it cook and then let a little of the egg underneath to cook.
Heat the broiler and place the english muffins on a cookie sheet. Split them open and put under the broiler until lightly toasted. Spread a tiny pat of butter on one side of each english muffin.
To put together, get a section on the eggs and place on the bottom of the english muffin, top with a slice of cheese. Tear 2 pieces of bacon in half and layer on top of cheese. Top with the english muffin top and eat. Serve with fresh fruit and milk.
Peanut Butter-Strawberry Whole Wheat Toast
Toast 2 slices of whole wheat bread
Spread 1-2 Tbls peanut butter on the toast
slice fresh strawberries and arrange all over the peanut butter
Eat with a glass of skim milk


Thursday, April 24, 2008

Garlicky Garbanzo Burgers

I love looking at the newspaper on Wednesday because I know that is when they print the Food section. Lately they have had some great recipes. We had these burgers along with Zucchini Soup (posted below) for a great meatless meal!
GREAT GARLICKY GARBANZO BURGERS adapted from The Deseret News
Start to finish: 20 minutes
1 1/4 cups bread crumbs
4 cloves fresh garlic
1 small onion (for about 1/3 cup finely minced)
1/4 green bell pepper (for about 1/4 cup minced)
1 can (15 ounces) chickpeas (garbanzo beans)
1 large egg
1/2 teaspoon black pepper
1/4 teaspoon salt, or to taste
2 Tbls olive oil
1/3 cup all-purpose flour
1/4 cup fat free mayonnaise
1 tablespoon fresh lemon juice
1/2 teaspoon extra-virgin olive oil
4 sandwich buns, for serving
4 lettuce leaves, for serving
4 tomato slices, for serving

Put the bread crumbs into a medium-size mixing bowl. Set aside.
Peel the garlic, and drop the cloves through the feed tube of the food processor with the motor running to finely mince them. Peel the onion, cut it in quarters and place them in the food-processor bowl with the minced garlic. Cut the bell pepper piece into quarters, and add them to the processor bowl. Pulse the motor until the onion and pepper are finely minced but not mushy, stopping once or twice to scrape down the sides of the bowl. Add the minced vegetables to the mixing bowl with the breadcrumbs.
Open the chickpea can and pour 2 tablespoons of the liquid from the can into the processor bowl. Then drain the chickpeas into a colander, discarding the remaining liquid, and rinse the chickpeas under cool tap water to remove excess sodium. Shake the colander to remove as much water as possible, and add the chickpeas to the processor bowl. Add the egg. Pulse just until the chickpeas are finely chopped but still have some texture. Add the chickpea mixture to the mixing bowl, along with the black pepper and salt. Stir until all of the ingredients are well mixed. Taste the mixture and season with additional salt if necessary.
Begin heating the oil in an extra-deep 12-inch skillet over medium-high heat. Shape the mixture into patties by first squeezing 1/4 of the mixture in your hands to make a tight ball. Flatten the ball into a patty, making it as thin as you can before it starts to crack. Repeat with the remaining mixture to make three more patties. Pour the 1/3 cup of flour onto a plate, and dredge the chickpea patties lightly in flour on each side. (Discard any remaining flour.) Add the patties to the hot oil, and fry until golden brown on each side, about 3 minutes per side.
While the patties cook, stir together the mayonnaise, lemon juice and olive oil in a small bowl. Set aside.
To serve, remove the patties from the skillet and place each on a bun. Top with lettuce, tomato and 1 tablespoon of the lemon-mayonnaise mixture (or to taste).
Yield: 4 servings.

Zucchini Soup

This soup was really good. I recommend garnishing with plenty of feta and radishes to give it more flavor.

Zucchini Soup (from Southern Living Magazine)
1 cup chopped celery
1 cup chopped onion
1 tablespoon olive oil
1 1/2 pounds zucchini, cut into 1/4-inch pieces (about 5 cups)
3 cups low-sodium chicken broth
1 (16-oz.) can cannellini beans, rinsed and drained
1 teaspoon salt
1/4 teaspoon seasoned pepper
Garnishes: thinly sliced radishes, crumbled feta cheese

1. Sauté chopped celery and onion in hot olive oil in a Dutch oven over medium-high heat 8 minutes or until tender.
2. Add zucchini and next 4 ingredients. Bring to a boil over medium heat; reduce heat to low, and simmer 10 minutes or until zucchini is tender. Remove from heat, and let stand 20 minutes.
3. Process soup, in batches, in a blender or food processor 30 seconds or until smooth. Return soup to Dutch oven, and cook over medium heat 5 minutes or until thoroughly heated. Garnish, if desired.
Note: You can also process soup with a handheld immersion blender directly in Dutch oven.

Wednesday, April 23, 2008

Cheese Pizza Sandwich

My son wanted a Pepperoni Pizza Sandwich but we didn't have any turkey pepperoni, so we went with A Cheese Pizza Sandwich.


I take two slices of bread and spread soft butter on the outsides.Then I spread pizza sauce on the inside of both pieces and put one piece on the hot griddle. Next comes a layer of shredded mozzarella or pizza blend cheese, the other piece of bread sauce side down on top of the layer of cheese. From there on out it is treated as a grilled cheese sandwich.

Chicken and Zucchini Stir-Fry

This is a family favorite. It is so easy and a great way to get in some veggies.


ZUCCHINI AND CHICKEN STIR FRY
Marinate:


1 pound sliced chicken meat

1 Tbls oil

1 tsp sugar

2 Tbls soy sauce

Halve and slice ½ inch thick:

1 ½ pds zucchini

Thinly slice 1 round onion and 1 large carrot

Finely mince: 1 tsp gingerroot and 1 clove garlic

Sauce: Mix and set aside until needed- 1 Tbls cornstarch, ½ tsp salt, ¼ cup oyster sauce, ¼ cup water

Heat 1 Tbls oil in wok until hot. Stir in half of the chicken and cook until done. Remove chicken and repeat with other half. Heat 1 Tbls oil in wok and stir in vegetables and flavorings. Stir fry veggies until tender and then add cooked chicken. Stir in sauce mix, stir and cook until thickened. Serve with hot rice and 1 large wedge of tomato, if desired.


Tuesday, April 22, 2008

TWD-Bill's Big Carrot Cake

This week's Tuesday's with Dorie recipe was chosen by Amanda over at slow like honey-Bill's Big Carrot Cake. Baking cakes is one of my favorite things to do. This cake smelled amazing and was a cinch to throw together. The recipe calls for three 9-inch layers, but that is alot of cake, so I made one 6-inch round for my brother at college (carrot cake is his ultimate fave!), one 8-inch round for us and 10 cupcakes because we were taking someone dinner. So it worked out perfect and we didn't have any leftover.


I went for the pecan-dried cranberries option in the cake and thought that it looked so pretty mixed with the carrots and coconut! I also added the zest of 1 lemon to this mixture before I mixed it into the batter.


I knew ahead of time from other TWDer's that the cupcakes would sink so I kept them upside down. My other cakes sank a little too, but the bottoms were beautiful so I iced them upside down.


My brother's personal 6 inch carrot cake with his initial in Craisins


This frosting came together beautifully I added the zest of 1 lemon to the frosting as well. What can I say, I love zesting citrus fruits! This cake turned out great and was delicious!


Bill's Big Carrot Cake
Baking: From My Home to Yours by Dorie Greenspan
Yields 10 servings
Ingredients:
For the cake:
2 cups all purpose flour
2 teaspoons baking powder
2 teaspoons baking soda
2 teaspoons ground cinnamon
¾ teaspoon salt
3 cups grated carrots (about 9 carrots, you can grate them in food processor fitted w/ a shredding a blade or use a box grater)
1 cup coarsely chopped walnuts or pecans
1 cup shredded coconut (sweetened or unsweetened)
½ cup moist, plump raisins (dark or golden) or dried cranberries
2 cups sugar
1 cup canola oil
4 large eggs

For the frosting:
8 ounces cream cheese, room temperature
1 stick ( 8 tablespoons) unsalted butter, at room temperature
1 pound or 3 and ¾ cups confectioners' sugar, sifted
1 tablespoon fresh lemon juice or ½ teaspoon pure lemon extract
½ cup shredded coconut (optional)
Finely chopped toasted nuts and/or toasted shredded coconut (optional)

Getting ready:
Position the racks to divide the oven into thirds and preheat the oven to 325 degrees Fahrenheit. Butter three 9-x-2-inch round cake pans, flour the insides, and tap out the excess. Put the two pans on one baking sheet and one on another.

To make the cake:
Whisk the flour, baking powder, baking soda, cinnamon and salt. In another bowl, stir together the carrots, chopped nuts, coconut, and raisins.
Working with a stand mixer, preferably fitted with a paddle attachment, or with a hand mixer in a large bowl, beat the sugar and oil together on a medium speed until smooth. Add the eggs one by one and continue to beat until the batter is even smoother. Reduce the speed to low and add the flour mixture, mixing only until the dry ingredients disappear. Gently mix the chunky ingredients. Divide the batter among the baking pans.
Bake for 40-50 minutes, rotating the pans from top to bottom and front to back at the midway point, until a thin knife inserted into the centers comes out clean. The cakes will have just started to come away from the sides of the pans. Transfer the cakes to cooling racks and cool for about 5 minutes, then run a knife around the sides of the cakes and unmold them. Invert and cool to room temperature right side up.
The cakes can be wrapped airtight and kept at room temperature overnight or frozen for up to 2 months.

To make the frosting:
Working with a stand mixer, preferably fitted with a paddle attachment or with a hand mixer in a large bowl, beat the cream cheese and butter together until smooth and creamy. Gradually add the sugar and continue to beat until the frosting is velvety smooth. Beat in the lemon juice or extract.
If you'd like coconut in the filling, scoop about half of the frosting and stir the coconut into this position.

To assemble the cake:
Put one layer top side up on a cardboard cake round or a cake plate protected by strips of wax or parchment paper. If you added the coconut to the frosting, use half of the coconut frosting to generously cover the first layer (or generously cover with plain frosting). Use an offset spatula or a spoon to smooth the frosting all the way to the edges of the layer. Top with the second layer, this time placing the cake stop side down, and frost with the remainder of the coconut frosting or plain frosting. Top with the last layer, right side up, and frost the top- and the sides- of the cake. Finish the top with swirls of frosting. If you want to top the cake with toasted nuts or coconut, sprinkle them on now while the frosting is soft.
Refrigerate the cake for 30 minutes, just to set the frosting before serving.

Serving:
This cake can be served as soon as the frosting is set. It can also wait, at room temperature and covered with a cake keeper overnight. The cake is best served in thick slices at room temperature and while it's good plain, it's even better with vanilla ice cream or some lemon curd.
Storing:
The cake will keep at room temperature for 2 to 3 days. It can also be frozen. Freeze it uncovered, then when it's firm, wrap airtight and freeze for up to 2 months. Defrost, still wrapped, overnight
in the refrigerator.